Thursday 26 May 2016

More, More, Mortar’s


Mr Steve picks up where he left off on his look at some of the interesting weapons in the Royal Artillery museum collection at Fort Nelson, Portsmouth.

Mallets mortar - Fort Nelson

The picture above and below are the final ones that show Mortars from my visit to Fort Nelson, in the first one you can see in-situ one of the three batteries making up some of its defensive capability. If being under direct fire from the Ramparts themselves wasn’t trouble enough then these 13 inch Mortar batteries would helpfully lob indirect fire at you at the same time. A three Mortar battery was located on each side of the fort and they were placed in their own earth covered vaulted chambers; shafts behind them were designed to let the smoke disperse, although you do wonder how effective
that would have been.

I have added a link to a very helpful page which gives much more details on these mortars (see PDF at the bottom of the article).

http://www.victorianforts.co.uk/tour1/three.htm

However it is very likely that by the time it came around for Fort Nelson to be fitted with its Mortars, military opinion had changed somewhat on their usefulness.

“The mortar batteries at Fort Nelson were not fitted with their mortars due to the fact that they were considered obsolete by the time Fort Nelson was finished. Also the crews found it difficult to observe the fall of their shot and had to rely upon messages sent down from the main ramparts before adjusting the charges to alter the range of the mortar. The mortars were superseded by howitzers that were placed in a more favourable position on the main ramparts. “(www.victorianforts.co.uk)

And

“The Portsdown Hill Forts were originally designed for a total of 40 13-inch mortars, with nine at Fort Nelson in three batteries. However, Fort Nelson was never fitted with them, due to the reverberation around the battery in firing, and the introduction in 1883 of the more accurate 6.6-inch Howitzer.” (www.royalarmouries.org)

This concussion/vibration effect of firing them in such an enclosed space was very discomfiting to the crew; these mortars in my picture do still get fired and this effect has been confirmed by the modern day volunteers even when using the much reduced charges that such demonstrations use. (The latest firing was 13th May 2016)

My second picture is of a selection of Coehorn Mortars, unfortunately I cannot tell you the calibres as I am afraid that I didn’t cotton onto the fact that I should also be taking a photo of the accompanying description plate until I was almost half way around.


They were invented by a Dutch officer in the 17th c, who was fortuitously called van Coehoorn*, however Coehorn Mortars have always been something of a puzzle to me, let’s face it, it’s just a small block of wood with a stumpy barrel fitted into it, how dangerous can it be?

Baron van Coehoorn
https://en.wikipedia.org/wiki/Menno_van_Coehoorn

And yet most armies had them, starting in 1674 at the siege of Grave and continuing on well into the mid nineteenth Century. Whilst researching this weapon I was staggered to learn that it was actually aimed!

“Aiming was a basic procedure. The gun layer stood behind the mortar with a plumb line and would direct the gunners to move the base until the plumb line and the centreline of the barrel were in line with the intended target. “
The Coehorn Mortar by Ian Balestrino

The British army used it extensively in 2.5, 3.5 and 4.5 inch versions. I suspect that the ones in the picture are of these sizes

According to Historic Scotland , the first known use of coehorn mortars in battle by the British Army was at the Battle of Glenshiel in 1719 ( not one I have heard of)

“The Battle of Glenshiel was a battle in the West Highlands of Scotland on 10 June 1719, between British government troops (mostly Scots) and an alliance of Jacobites and Spanish resulting in a victory for the government forces. It was the last close engagement of British and foreign troops in Great Britain. The Battle of Glen Shiel is sometimes considered an extension of the Jocobite Rising of 1715, but is more correctly a separate rebellion and was the only rising to be extinguished by a single
military action..” Wikipedia

See also
http://data.historic-scotland.gov.uk/data/docs/battlefields/glenshiel_summary.pdf

Don’t bother to write in if this is wrong and they were used early, I have already lost interest.

Six Coehorns are also listed as part of the British forces that fought the Jacobites unsuccessfully at Prestonpans though the shells were said to be “damp and unreliable”

This seems to be a pattern, perhaps it was seen as an anti-scot weapon?

Still they seem very popular and every army had to have some, Coehorns were still being used in the American Civil War by both sides although by now they were a little more advanced, but not much

“The US Army had a 24-pounder brass Coehorn that weighed 164 pounds, or 296 pounds when mounted on its four-handled oak mortar bed. Two men could move this mortar, but four men could better manoeuvre and rush this mortar into position in unprepared locations. Explosive shells could be lobbed into masked targets from 50 to 1,200 yards with the Coehorn.

Although the Model 1841 24 pdr. Coehorn is the most widely used on the Union side, the Confederate army did cast and use Iron 12 pdr. Coehorns, with a bore of 4.62 inches, as well as Iron 24 pdrs. As the war progressed, trench warfare became quite common, and mortars were found to be increasingly useful.

http://civilwarwiki.net/wiki/Civil_War_Era_Mortars

I guess by this time we are seeing what would eventually become the trench mortar in WW1 and this I think also answers my initial question at the beginning of this piece of why would anyone want this thing ?

Besides its many siege related use’s it’s also the first man-portable squad mortar.

And finally I have just come across them again in my latest bedtime reading, this time being used by the Russians against the Turks in 1773; I suppose I need to re consider my opinion of these stubby little guns.

Tuesday 24 May 2016

1/95e Regiment de Ligne


It was on the 1st of June 1734 that the 9th Swiss Regiment for service in the Bourbon French Army was raised in the Swiss canton of Grisons under the command of Baron Travers. In 1740 the regiment was renamed Regiment de Salis-Soglio, then in 1744 Regiment de Salis Mayenfeld and listed as the 99e Regiment of Infantry, changing its title again in 1762 the the Regiment de Salis-Marchlins.

In 1791 the regiment moved up in the lists and was retitled 95e  Regiment d'Infanterie only to be disbanded the following year in Corsica.


In 1794 the regiment was re-raised as the 95e demi-brigade de bataille under Colonel Gudin and was composed of the following elements:
1er bataillon, 48e Regiment d'Infanterie
2e batallion, Volontaires de la Creuse
8e batallion, Volontaires de la Haute-Saone

In 1798 the regiment was reorganised under Colonel Jean Veinnet and was composed of the following units:
Detachments of the 22e, 29e, 51e and 94e demi-brigades d'Infanterie de Ligne

Shako Plate 1810 - Rousselot
During this time the regiment was on active service against the Austrians on the Rhine frontier with an attachment to the forces organised for the expedition to Ireland in 1796.


In 1803 and the rise of Napoleon the regiment was retitled the 95e Regiment d'Infanterie de Ligne under Colonel Marc-Nicolas-Louis Pechaux who would command it at Talavera.
Marc-Nicolas-Louis Pecheux


In 1805 it was present at Austerlitz and would go on to gain the honours of Jena in 1806 and Freidland in 1807


The 95e Ligne is the one regiment I have the least information about and thus have relied very much on the Otto Manuscript illustrations for a guide to the look of the regiment in 1809.


As you can see there is nothing illustrating the fusilier or voltigeur company men or the musicians and I have thus gone with a classic look for these companies without any other sources to go on.


Points to note are the white chords worn by the grenadier and the pale light blue of the facings on the sapper which I have chosen to replicate on the musicians for my regimental look.

Rousselot's interpretation of the Otto illustration above
My 1/95e Ligne are composed of figures from AB and the fanion is from GMB Flags


With this first battalion of the 95e Ligne done, it just leaves two more battalions to complete the regiment and the twenty-four line battalions that composed Victor's I Corps d'Armee. In the next post featuring the second battalion we will look at the regiments involvement in the Peninsular War prior to Talavera.


Sources consulted for this post included:
Napoleon's Line Infantry, Haythornthwaite and Fosten - Osprey Men at Arms
French Napoleonic Line Infantry - Emir Bukhari
Napoleon's Soldiers, The Grande Armee of 1807 (The Otto Manuscript) - Guy C Dempsey Jr.
https://fr.wikipedia.org/wiki/95e_r%C3%A9giment_d%27infanterie
http://www.napoleon-series.org/military/organization/c_frenchinf10.html
http://www.wikiwand.com/de/Infanterie_%C3%A9trang%C3%A8re_de_ligne#/Schweizer_Regimenter

Next up JJ's Wargames Artillery Correspondent, Mr Steve will have yet more information for you big gun fanciers with the next post covering his look at the Royal Artillery collection at Fort Nelson, Portsmouth.

Sunday 22 May 2016

Aesthetics in Wargames - Another Aunt Sally?

JJ's Roman's - terrorise not only the Dacian's but some wargamers from getting involved in the hobby- really?
Every now and then "JJ's Wargames" likes to go off on one and start a debate rolling on a theme that is common to most of us in the hobby. Recent examples included the loss and retention of the painting mojo, which seemed to strike a chord with many.

http://jjwargames.blogspot.co.uk/2015/10/the-perennial-problem-how-to-avoid.html

Painting and modelling is an important aspect of our hobby, otherwise we would likely be solely board gamers, and JJ's has always been a blog keen to support other like minds that enjoy that aspect.

Therefore I felt the need to respond to an article by Arthur Harman in June's, Miniature Wargames magazine entitled 'The look of the thing, Artistic licence in wargaming'

Firstly I think I should explain the expression of making the subject of debate an "Aunt Sally" which may not be a term familiar to all, certainly outside the UK. The definition of the expression is as follows.

Definition of Aunt Sally:
a game played in some parts of Britain in which players throw sticks or balls at a wooden dummy.
• a dummy used in the game of Aunt Sally. plural noun: Aunt Sallies
• a person or thing set up as an easy target for criticism. "today's landowner is everyone's Aunt Sally"

I was really surprised to read the article by Arthur Harman in Miniature Wargames magazine, that posed the question;
"whether aesthetics should be allowed to dominate  our enjoyment of a wargame, or deter us from getting stuck in. Is our terror of the roving photographer or blogger to blame?"

I have heard and seen the odd comment that there is a body of opinion that supports this proposition and had always thought it to be a very outlandish idea, and not likely to be taken seriously in the mainstream of the hobby, perhaps I was wrong. If that is the case then I think this idea needs challenging.

As you can see the question has two parts to its proposition:
  • firstly it rather presupposes that the reader agrees that aesthetics already dominates our enjoyment of the hobby.
  • and secondly suggests that we are terrorised by the "wargames fashionistas" who will come and make us feel bad about ourselves because we can't live up to the "Aunt Sally" of aesthetic perfection that it suggests we are all in pursuit of.

Really? The thought that anyone could allow themselves and their approach to their hobby to be directed by what others deemed to be a requirement to take part, I find quite bizarre. I personally wouldn't give anyone the right to make me feel that way and I don't know anyone in the circle of gamers I play with who would. Perhaps this thinking is a symptom of the modern fashion of games systems requiring everyone to use the same rules and figures in the same way, waiting for pronouncements on high as to what the "same way" is.

After reading the question and giving it some consideration my curiosity was fired and I pressed on into the article, which went on to quote Neil Shuck;
"Miniature Wargaming ..... is actually quite a complex hobby..... it's not just about the wargame rules and game, but about collecting, assembling and painting model soldiers...." and that "it could be weeks (or indeed months or even years) before an army is painted and ready to put into the field of battle. This is a huge hurdle, and has surely put off untold numbers of would-be wargamers due to large commitment of time, resources and skills required..."

The author then agrees with Neil Shuck's quote stating that he could think of many campaigns or periods not embarked upon for this reason.

So again let's think about the implications covered in the quote;
  • Miniature Wargaming is quite a complex hobby
  • It can be time/finance consuming, building a collection of figures
  • The skills required and the commitment to complete a given project could put players off from getting involved in the first place.
If we replaced the words "Miniature Wargaming", with "Radio Controlled Model Aircraft building" or "Piano playing" or "Horse Riding" or "Deep Sea Fishing" or dare I say "Model Railway Collecting", those criticisms could be levelled at lots of hobbies some a lot more complex, time/finance consuming and skill set requiring than ours.

Come on chaps, if we are as passionate, as I know from the comments received on this blog that many of us wargamers are, about our hobby, we don't care about the little list of "asks" that wargaming might demand of us to build the collection and run the games we want to play, because we can't help ourselves, we love it and we will move hell and high water to do what we want to do; even if that means learning the modelling skills, rule sets, finding the resources and time and building friendships with like-minded folk who want to play the games we do, and by our example bringing others into this great hobby.

An early 19thC aquatint that is recommended as the inspiration for our games
The web and magazines are full of articles and information out there to help us in our pursuit of wargaming nirvana, something older generations (I include myself) really appreciate as no such quantity of resource existed when we started in the hobby. From my experience there are lots of people out there happy to share their skills and encouragement to help bring new people into it and there has never been a better time to get involved, with the figure ranges, terrain options and great painting/modelling resources available. 

This blog like many others is dedicated to encouraging others to get involved in wargaming at whatever level they choose to, but not afraid to also encourage the pursuit of aesthetics in it as well; and I felt impelled to answer the criticism implied in the article and to offer a much more positive slant than the diagnosis and prescription that followed of rejecting the production of great looking games and collections in favour of the alternative and returning to bare based figures, functional terrain with contour stepped hills and figures all in the same pose. 

Hey, if the latter approach does it for you, you will not hear or read any criticism from this blog, each to their own as I have already stated, but conversely don't expect any support for the idea that great aesthetics in wargames puts people off from getting involved, if anything I believe the reverse is more true. 

I would not have been attracted into wargaming if all the books on the subject in the mid seventies had been in the style of Don Featherstone (God bless him) and Tony Bath with the functional looking games they produced. It was Peter Gilder and his fantastic looking games, that I had no hope of recreating at the time, that fired my enthusiasm and set the goal to emulate. I have memories of the frustration of not being able to get my games to look that good, but also the desire to get better and add to my skills.

That said I carried several Don Featherstone tomes around with me for months re-reading the text rather than admiring the pictures, which I rejected as being what the game should look like for me. Note these statements are personal, and I don't expect others to feel the same way, but likewise I don't think we should allow others to determine how we feel about our hobby and the way we want to do it.

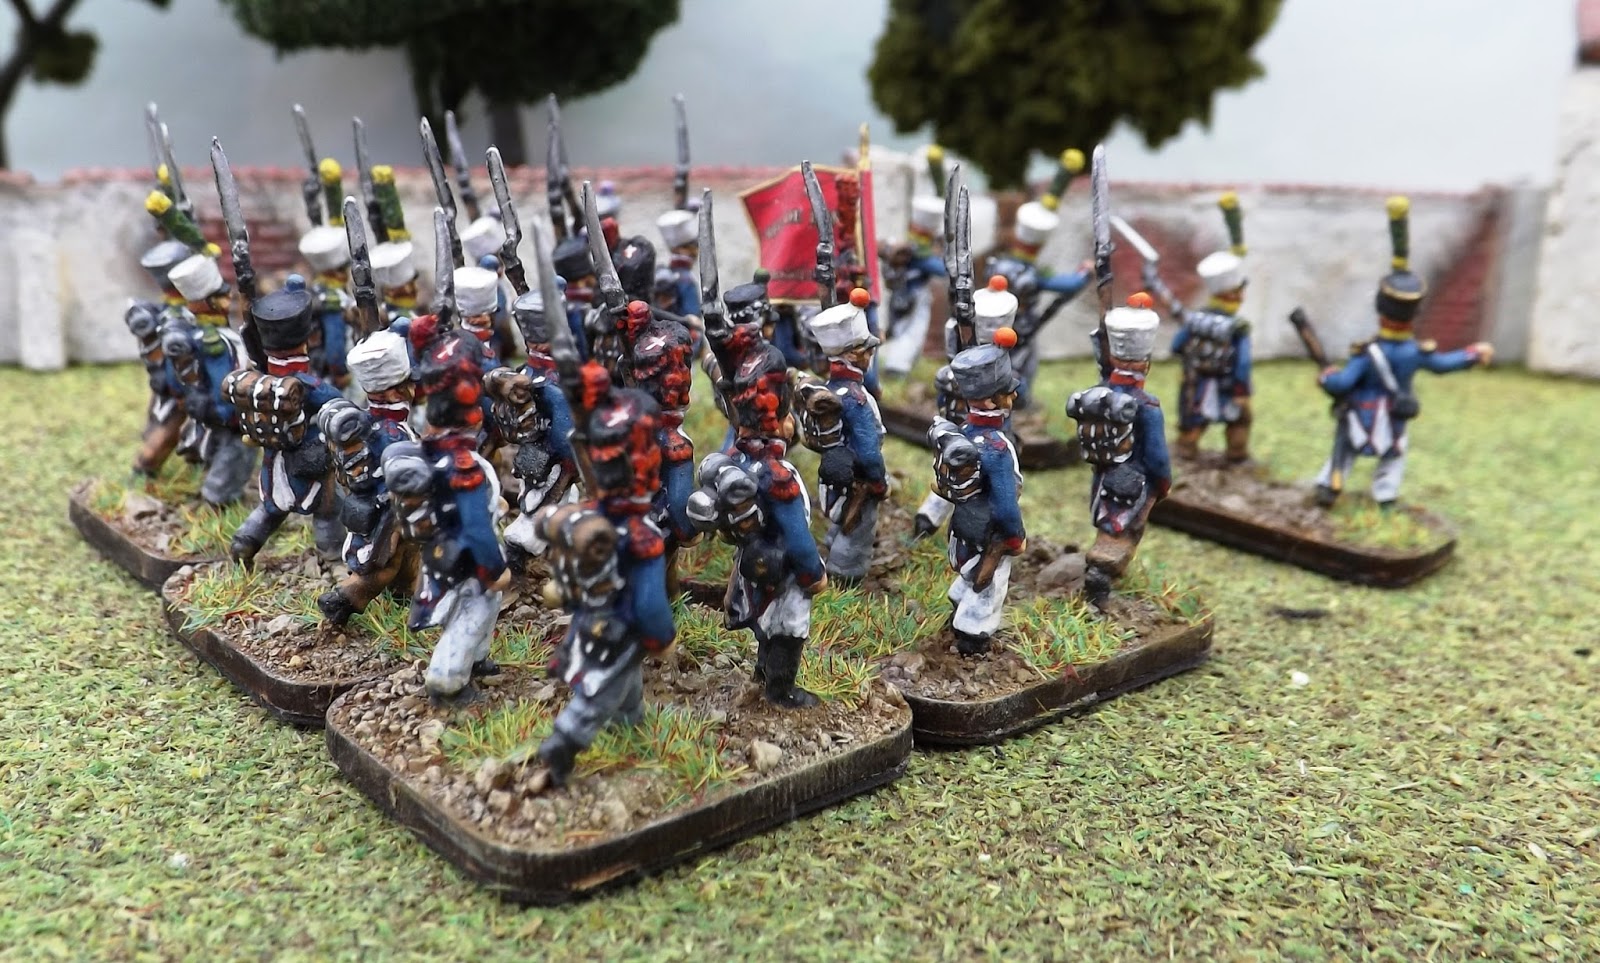
A JJ's version of an early 19thC aquatint
I think the picture of the hobby that is presented to the wider world is important to attracting more people into it and I think the best aesthetically looking collections and games go a huge way to doing that, but also the need to present what wargaming has always been, namely a welcoming, encouraging, supportive community of hobbyists producing great variation on the theme.

I don't think we should buy into the negative way of thinking that says excellence puts undue pressure on individuals to live up to - rubbish! We only put pressure on ourselves if we decide to think that way and a more positive way to think is that I will play the games I want to in my way with people who also enjoy a similar approach and I will decide what I consider excellent and what I want to emulate/copy into my own games.

In addition I don't want to buy in to the mantra of "I can't".
I can't paint, I can't find the time, I can't not help feeling pressurised by others. If you think like that then you are right, you can't. But the good news is that you don't have to think that way.

I regularly hear people on pod-casts saying they can't paint and some even being proud that they can't and don't paint despite being their to promote a hobby that would suggest a modicum of painting being required. 

We don't play board games we play tabletop games with figures and terrain, most of us for the aesthetics of picturing our warrior units in action and performing the heroic deeds we have read about. I say most of us, because Arthur Harman states that he finds the use of figures more as an aid memoir as to what the unit is, although I am not totally convinced when he states that he wouldn't use counters from board games because the counters do not allow him to get "emotionally involved"

The use of the phrase"emotionally involved" is revealing and suggests that the figures in the wargame are more than just fancy game markers as suggested and I don't really buy the idea of producing armies that model the stylised early nineteenth century engravings of William Heath as the justification for ignoring the painting ideas of greats such as Kevin Dallimore.

Kevin Dallimore's step wise approach to painting illustrated in his books, enable and allow wargamers to produce, good, very good or collector standard units of figures depending on what they want to achieve and the level of input they are prepared to make.

Kevin Dallimore has done a lot to help and
encourage great painting to all standards
If I were to make one suggestion that might chime with this "can't paint, won't paint" agenda it would be the rise of the painting competition. Like it's near neighbour the wargame competition, the mere thought leaves me cold and its development in the hobby might explain why some of our fellow hobbyists feel under pressure to perform.

I spend my professional life in competition and the last thing I am looking for in my hobby is more competition; again whatever floats your boat is fine by me, this is just my opinion. I have no interest in competing in wargaming or wargame painting and in the latter I go out of my way in not making judgements about others styles and techniques, with the exception of commenting on professional painting examples in commercial products such as books being sold to wargamers, where I feel it is open to comment in review.

Competition is seeping into many so called hobbies and pastimes. We have TV shows with baking competitions, cookery competitions, singing competitions, activities that many of us considered as worthy of merit purely for the doing rather than being better at than others based on someone else's opinion. This, I think, has probably encouraged a generation of self appointed judges, ready to raise up or put down the efforts of others whether they had decided to be in a competition or not.

In my local club, we have many and different standards of painted collections. The only club rule is that figures brought to it have to be painted and ready to play, ie no "silver surfers". As a club, we enjoy sharing modelling and painting ideas and the games we produce have, I think, got better over the years as we all have improved our skills by sharing and supporting each other. There is no competition, only a desire to produce nice looking games and collections and have fun with our great hobby away from the requirements of our professional lives. Club participants are encouraged to get involved in all aspects of the hobby and we can boast some fine collections within the group which has a well defined spirit of independent thought typical of this part of the UK since the Prayer Book Rebellion of 1549 and before. 

The point is none of us feel controlled by the hobby and are able to make space for all types and levels of games from the simple to the excellent and that approach has, like a rising tide, raised all boats by enabling us as a club to produce more and more aesthetically pleasing games.

So in summary, ignore the "can't paint, won't paint" agenda and embrace all aspects of the hobby in a spirit of getting the most out of it for you as an individual and don't feel you have to go about it according to the "wargame fashionistas" and what they think, say or are able to do.

Importantly, don't surrender to an apathy of I can never produce the games I would like to, so I'm going to tell everyone I don't care. The fact is if someone has already done something then you can to and it then comes down to what you really want and what you are prepared to commit to achieve it, and there are loads of people and resources out there to help.

Happy Wargaming

Sunday 15 May 2016

Augustus to Aurelian - Dacian War Unit Cards

Roman Troop Type options in Augustus to Aurelian for my Dacian Wars collection
They say that imitation is the sincerest form of flattery and so I have to thank Shed Wars

http://shedwars.blogspot.co.uk/2016/05/ecw-unit-cards.html

for providing the inspiration for getting on with a little job that I have been meaning to do ever since our test game of Augustus to Aurelian back in January this year.

Devon Wargames Group - Augustus to Aurelian play test

Dacian troop types
AtoA is another of those rule sets that uses multiple ranges of dice and factors together with unit specific rules that requires a certain amount of pre game notation.

For our test game I had prepared unit rosters with this information captured, as I had worked out the size of the units which impacts on the number of dice they get to roll and their factors adjusted for unit size.

I soon realised that as most units of the same type were organised similarly, there was no need for a roster and simple unit cards with the the data prepared for reference during the game was all that was required.

Sarmatian and Neutral types
So my first efforts prepared with my Dacian Wars collection in mind are as you see them following Shed Wars layout and colour coded system with Red(Roman), Buff(Dacian), Purple(Sarmatian) and Neutral(White - could be used by any faction).

The cards carry information about the weapons and protection the unit has, then details their combat, shooting, morale and training according the AtoA listings and adjusted for unit size. The movement rate in inches and the circular motif showing the size of the unit as L(large), M(medium), S(small) and T(tiny).

The final information at the very bottom identifies in italics any special rules that apply to these troops.

The other new event that has focused my attention on my Dacian War collection plans is the chance to upgrade my Legionaries with a new and exciting range of plastics on the offing from Victrix in the form of their planned Early Imperial Roman Legionaries

Victrix EIR Legionaries announced recently
I have always been a bit frustrated when comparing my Warlord Legionaries to their Auxiliary comrades and the fact that Warlord couldn't make their mind up in the early days on the scale of figure they intended to produce.

I had dabbled with the idea of gradually introducing Foundry Roman Legionaries into the collection, but I am now holding fire to check out these tempting little beauties when they roll our from Victrix hopefully quite soon.

Other news on the Dacian Wars front is that I have invested in some Renendra 28mm wattle fencing sections to allow for deployment of those annoying (Roman perspective), 'defensive works in a narrow valley' set ups that Dacian commanders were want to prepare to block and frustrate Roman movements towards their strongholds.


And finally one other idea that has crept into the mix is a plan to play test a new way of determining initiative in AtoA as an alternative to cards but maintaining the unpredictability together with the ability to command the initiative as per the Carpe Diem mechanic, I want to stay unspecific about this until I've had a chance to play test it with Mr Steve, but I am quite excited about its potential.

Wednesday 11 May 2016

Battlefields in Devon - Battle of Sourton Down 1643

Sourton Down - A surprise night attack is countered by a daring cavalry attack on an enemy column of march
Whilst out on our trip to Lydford, Carolyn and I stopped to check out another Devon battlefield close by at Sourton Down situated on the A30, near Okehampton, the main route north of Dartmoor and our road home that afternoon.

Battlefields in Devon - Battle of Bindon
Battlefields in Devon - Battle of Bovey Heath
Battlefields in Devon - Battle of Lydford

The fact that this battle lies on one of the modern roads and major routes through the county indicates why this battle occurred in the first place, and unlike the other English Civil War battle site Will and I checked out at Bovey Heath, occurred at the start of the war when Royalist fortunes were in the ascendancy in the south west as the King and Parliament scrambled to assemble their forces and grab important areas of the country.

Battlefields in Devon - explored too date
With hopes dashed of a quick resolution of the King's dispute with his Parliament, following his failure to capture London after the Battle of Edgehill on 21st October 1642, the whole of England and Wales, soon to be followed by Scotland and Ireland were drawn into the spreading conflict.

King Charles I holding council before the Battle of Edgehill - Charles Landseer 1845
The South West of England was was one of the first regions to get involved in the struggle, and there were distinct differences in the political sympathies between Cornwall and Devon. These differences born out of social and economic structures would see Cornwall rally to the King with Sir Ralph Hopton described as a competent if unimaginative commander, leading its forces built around a strongly motivated force of five regiments of Cornish infantry totalling about fifteen hundred men.

Sir Ralph Hopton, 1st Baron Hopton

The County of Devon was England's third largest county and one of the wealthiest which caused it to be a principle target for the King's forced loans that was a principle cause for its leaning towards Parliament. The Devon Parliamentary Committee aware of Royalist mobilisation in Cornwall quickly set about securing and strengthening the defences of Plymouth, Exeter and the north Devon ports and suppressing potential Royalist sympathisers in south Devon.

Sir Ralph Hopton, leader of the Royalist forces in Cornwall
In 1643 there were three main roads that crossed the River Tamar, the county border, from Cornwall into Devon linking up with Plymouth, Tavistock and Okehampton. These roads were poor and the surrounding terrain rocky and difficult, making the Tamar a formidable barrier either way.

In the November of 1642 Hopton, encouraged by promised support from Devon Royalists made his first attempt at taking the cities of Plymouth and Exeter, but was let down by his expected reinforcements and after several months of inconclusive skirmishing, failed to take either and found himself back in Launceston in Cornwall by January 1643.

Map to illustrate the principle towns in Devon with the three key routes into the county from
Cornwall via Plymouth, Tavistock and Okehampton
The initiative now shifted to the Parliamentary forces, primarily garrisoning Plymouth under Colonel William Ruthven, who with the expectation of reinforcements under the Earl of Stamford would be able to muster a combined force of 4,500 men. However instead of waiting for the reinforcements, Ruthven marched from Plymouth with his force alone crossing the Tamar and heading for Liskeard.

Ruthven's force of  3,500 men was met by a revived Royalist army of perhaps 5,000 men and was  defeated at the Battle of Braddock Down on 19th January 1643, losing twelve hundred men captured and about two hundred dead. The defeat ended all possibilities of Parliamentary control of Cornwall and re-opened the opportunity for the Royalists to re-invade Devon.
Battle of Braddock Down

Colonel William Ruthven
With Stamford's troops now forced to garrison Plymouth on learning of the defeat at Braddock Down, Hopton moved on Tavistock, realising that Plymouth, supported by the navy, was too strong to be taken and thus could only be screened. The two sides found themselves in a stalemate with neither strong enough to force the issue.

A truce was agreed in March 1643, later extended until the 22nd April, with Hopton's forces once again pulled back west of the Tamar. Both sides used the opportunity to recruit and build up their forces prior to renewing hostilities.

By the 22nd April Parliament now had a field force of about fifteen hundred foot and two hundred horse under the energetic twenty-five year old Major General James Chudleigh. The Royalists had superior numbers but were handicapped by being forced to spread their numbers guarding the various crossing points along the Tamar.

Major General James Chudleigh

The main Royalist field force of about twelve hundred men was based at Launceston and it was from there that on the 23rd April Hopton learnt that Chudleigh's force was across the Tamar and advancing on him. The two sides advanced on each other to the east of Launceston and the fighting saw the Royalists gradually receive reinforcements throughout the day as outlying forces arrived to enable them to push Chudleigh's men back over the Tamar. The losses were light on both sides with Chudleigh's force losing about ten dead and forty wounded.

The Battle of Sourton Down, 25th April 1643 - Hopton's Royalists in column of march moving east towards Okehampton are surprised by Chudleigh's Parliamentarians charging down hill

The Royalist pursuit of Chudleigh was poor as a mutiny broke out among the Cornish regiments, to quote Hopton:

"The common soldiers, according to their usual custom after a fight, grew disorderly and mutinous, and the commanders were always short of means either to satisfy them or otherwise to command them"

Battle of Sourton Down

When order had finally been restored in Royalist ranks, Chudleigh had fallen back to Okehampton, and it was not until the 25th of April that Hopton was able to exploit his position by launching a dawn attack on the Parliamentary force.

The Royalist force set off on its night march crossing Sourton Down in column led by one hundred and fifty dragoons, then came half the foot followed by the artillery, followed by the remaining foot and three hundred horse and dragoons bringing up the rear.

The view, sadly obscured today by the modern A30, of South Down Hill, with the heights of Dartmoor beyond, down which Chudleigh launched his surprise charge.
The news of the enemy approach caught Chudleigh and his force by surprise, with little time to form up and the likelihood of having to abandon his guns. He wrote later:

"By the intolerable neglect of our lying deputy Scout Master, we were surprised by the whole enemy body of horse and foot.... and by the incomparable dullness of Sergeant Major Price, the carriage of our Ammunition and artillery was dismissed, contrary to orders express against it, so that I was forced to this sad Dilemma, to loose the Ordnance, and all that we had here (which in all probability would have been the ruin of the whole Kingdom) or to hazard a desperate Charge (which for ought I knew might have routed the whole army)."

With limited options to deal with the impending threat, Chudleigh decided to fight, to give his force the best chance of escaping the trap.

Leaving his infantry to form up as quickly as they could and follow on, he lead three troops of horse, totalling one hundred and eight men out onto Sourton Down, splitting his force into six squadrons numbering just eighteen men each and spreading them out across South Down Hill, making best use of the darkness and cover.

The Royalist column of march would have been struck along this road, where the main fighting occurred
When Chudleigh gave the order to charge, surprise was complete;
"blissfully unaware of the imminent threat, never they conceived, in better order, nor in better equipage, nor ever, (which had like to have spoiled all) in less apprehension of the Enemy."

Hopton, Colonel Thomas Bassett and Sir John Berkeley were riding at the head of the column when Captain Thomas Drake (a good sounding Devon surname), came galloping out of the darkness, firing at Hopton's dragoons and yelling, "Fall on, fall on, they run, they run!"


Chudleigh's dragoons, produced a crashing volley that disrupted the Royalist ranks before moving to block the road to Okehampton
The Parliamentary dragoons leapt from their horses and fired a crashing volley into the flanks of the surprised Royalist foot, whilst the cavalry charged home scattering the Royalists that opposed them.

Chudleigh, seeing the success gained and the confusion in the enemy ranks, sent off a messenger towards Okehampton to order his infantry to join him immediately, to exploit the chaos they had caused.

The fields behind the service area show slight undulations where the prehistoric earthworks gave the Royalist a rallying point
Then the heavens opened and a thunderstorm and torrential rain swept over the battle, causing a pause and allowing both sides to rally and regroup their forces, with Chudleigh pulling his cavalry back up the slope and moving his dragoons to form a blocking force on the road to Okehampton.

Meanwhile, Hopton, still unaware as to the size of the force that opposed him, reformed off the road (around the modern day service area) and then probed forward towards the hill, discovering how weak the Parliamentary force was and ordering an immediate counter-attack that pushed Chudleigh's men further up the hill.

As his counter-attack developed Hopton's attention was drawn to the approaching Parliamentary infantry marching up the road from Okehampton. Still unclear about the size of the force that opposed him and fearing that the aggressive posture of the enemy suggested they had been reinforced, he decided to pull his men back towards the prehistoric earthworks on the other side of the road to the north.

The service area occupies the centre of the battlefield
It was still very dark with heavy rain falling by the time Chudleigh's infantry drew up before the Royalist's in the earthworks; by which time Hopton had drawn up his guns which opened up a devastating fire.

Chudleigh realised that they were firing towards the dull red glows of the infantry musket fuses, which they quickly began to extinguish. The order to stop was given and Chudleigh had his men drape their fuses over the surrounding gorse bushes before retiring his force back to their warm billets in Okehampton, leaving the Royalists to spend a very uncomfortable night on the rain sodden, wind swept slopes of Dartmoor. (I have stopped at this service area many times to fuel the car and there is no place in the West Country more exposed to the elements than Sourton Down).

The next morning Hopton realised he had been duped, but seeing the bedraggled exhausted state of his men ordered a retreat back to Launceston to recover.

This skirmish, rather than battle, typified the type of actions that featured in the early civil war in the South West with probably no more than about 3,500 men in Hopton's force against 1,200 men in Chudleigh's, but despite the size of the opposing forces, the factors that occurred with the surprise attack in darkness against a column of march would make this an interesting encounter to model on the table.

Hopton would return and win a decisive victory at the Battle of Stratton the following month, tipping the balance of power in the South West back in favour of the King, not to be seriously challenged until the arrival of Sir Thomas Fairfax, Oliver Cromwell and the New Model Army in 1645-6, which I covered in the post about Bovey Heath (see link above).

Battle of Stratton

Other sources referred to in this post:
Battlefield Walks Devon - Rupert Matthews
The Civil War in the South West - John Barratt

Sunday 8 May 2016

Mallet's Mortar - Fort Nelson


Post from our roving correspondent 'Mr Steve'.

Last year I went to Fort Nelson which is located in the hills just north of Portsmouth and where the Royal Artillery has its Museum. Originally built as one of Lord Palmerston’s 19th C follies it now houses a fine collection of artillery from through-out the ages.

https://en.wikipedia.org/wiki/Palmerston_Forts

As I only took photos of those things that interested me I cannot give you a full guided tour so I will just pick out some of the more interesting items and occasionally drip them in from time to time. This short article therefore is about the giant mortar which stands outside the fort.

It was 1854 and the British government wanted a big mortar however it also needed to be easily transported (i.e. an IKEA version) so they put out a requirement for tender and given that they were in the middle of the Crimean war they wanted it urgently.

One of the people who submitted plans was Robert Mallet, the son of an Irish iron foundry owner; he had graduated in Science and Mathematics and was also extremely interested in earthquakes and their energy waves. His proposal was that if you threw up a big enough bomb then it didn’t have to actually hit its target to do really serious damage. Using his iron manufacturer skills he submitted a plan for a giant mortar made up from multiple parts and which would sit on three layers of heavy bulk timber rather than on a purpose built base.


Henry John Temple, 3rd Viscount Palmerston,
Prime Minister, 1855-58 and 1859-65 
Initially meeting with no interest his idea was picked up by Palmerston himself and he instructed that two of Mallet’s mortars should be built however by the time they were ready for trialling the war they were designed for had been over by at least a year.

Unlike other follies these were actually fired, a grand total of nineteen rounds with each shot causing various amounts of damage to the first mortar and with no prospect of curing the faults the project was cancelled.

Claimed by many websites as the largest mortar ever made, each shot weighed over a ton and had a range of around a mile and a half.

(However according to Wikipedia:The largest mortars ever developed were the Belgian "Monster Mortar" 36 French inches; 975 mm;  1832, Mallet's Mortar 36 inches; 910 mm; 1857 and the "Little David" 36 inches; 914.4 mm; developed in the United States for use in WW2.All three mortars had a calibre of 36 "inches", but only the "Monster Mortar" saw action ) and it also depends on how you classify the seven WW2 German Karl Mortars.

The unfired gun is the one in the picture whilst the test gun is also still in existence and is currently at the army base at Woolwich.

Mallet went back to his study of earthquakes; something for which he was clearly much more suited to because he would later became very highly respected for his work on seismology.

There are much better photos easily available on line and which show the shear scale of this thing much better than my long distance picture does, I do think that you might need a mate to help you with lifting up one of the balls for loading.

The link below is just one of the better articles on this weapon (and is also nice and short)

http://dawlishchronicles.com/mallets-monster-mortar-and-the-birth-of-seismology/.

Friday 6 May 2016

3/94e Regiment de Ligne


The 94e Regiment de Ligne under Colonel Combelle were destined to play the role of I Corps d'Armee reserve alongside their comrades in the 95e Ligne.

1/94e Regiment de Ligne
2/94e Regiment de Ligne


Taking no part in the combats of the 27th and early morning of the 28th July, their place was to secure the Cerro de Cascajal as the 'launch pad' for French attacks against Wellesley's line anchored on the Cerro de Medellin opposite.

1st Corps: Maréchal Victor
1st Division: Général de division Ruffin (5,286)
Brigade:
9th Légère Regiment (3)
24th Line Regiment (3)
Brigade: Général de brigade Barrois
96th Line Regiment (3)

2nd Division: Général de division Lapisse (6,862)
Brigade: Général de brigade Laplannes
16th Légère Regiment (3)
45th Line Regiment (3)
Brigade: Général de brigade Solignac
8th Line Regiment (3)
54th Line Regiment (3)

3rd Division: Général de division Villatte (6,135)
Brigade: Général de brigade Cassagne
27th Légère Regiment (3)
63rd Line Regiment (3)
Brigade: Général de brigade Puthod
94th Line Regiment (3)
95th Line Regiment (3)

Cavalry Brigade: Général de brigade Beaumont (980)
2nd Hussar Regiment
5th Chasseur à Cheval Regiment
Artillery: (48 guns)


A veteran French regiment in their own right, I am sure there would have been frustration among the rank and file as they observed their comrades in the 3rd Division, in General Cassagne's brigade, head off down the slopes to support the half hearted attack into the northern valley.


That said it takes stoicism and firm discipline to stand throughout the day taking the occasional pass through round-shot, no doubt aimed at the French gun line to their front, without being able to hit back at the enemy.


The casualty rate of 145 men was by no means anywhere near the highest loss suffered by Victor's infantry regiments but with 21 killed and 123 men wounded, their losses show that the 94e Ligne paid their price whilst in reserve.


My 3/94e Ligne are composed of figures from AB and carry a third battalion fanion from GMB Flags.


The regiment, en mass, make a fine display with their grenadiers resplendent in their bearskins and complete the seventh regiment of the eight in Victor's corps.


So the project moves on to the final French line regiment, the three battalions of the 95e Regiment de Ligne.

I think these shots of the 94e Ligne will give you a feel for what all eight regiments will look like when we do the afternoon attack and should certainly give the Allied players some food for thought!


Sources used in this and other posts about the 94e Ligne included:
Napoleon's Line Infantry, Osprey Men at Arms - Philip Haythornthwaite, Bryan Fosten
French Napoleonic Line Infantry - Emir Bukhari
Napoleon's Soldiers, The Grande Armee of 1807 (The Otto Manuscript) - Guy C Dempsey Jr.
Napoleonic Armies, A Wargamers Campaign Directory - Ray Johnson
Talavera, Wellington's First Victory in Spain - Andrew W. Field
The Peninsular War Atlas - Colonel Nick Lipscombe

Tuesday 3 May 2016

Battlefields in Devon - Battle of Lydford 997 AD

A Viking attack under way much as would have been seen at Lydford in 997 AD
Continuing the series of posts looking at battlefields in Devon, Carolyn and I took some time out over the May Bank Holiday to go and explore the Saxon town of Lydford on the north west corner of Dartmoor; probably more famous for the local Lydford Gorge that attracts holiday makers to this part of Devon each year than the Viking/Saxon battle that was fought here in 997AD.

Battlefields in Devon - Battle of Bindon
Battlefields in Devon - Battle of Bovey Heath

Battles covered so far  in this series of posts with Lydford illustrated on the north west extremities
of Dartmoor and with the River Tamar valley to its south on the coast between Devon and Cornwall
where the Vikings landed.
In 997 the King of Wessex was Aethelred the Unready which gives a bit of a clue as to how good a king this chap was. The 'unready' bit would better translate from the Anglo-Saxon into 'bad-council', but either way poor old Aethelred doesn't score high in the charts of great Anglo-Saxon kings.

King Aethelred the Unready
Following a comparatively peaceful interval in the mid tenth century after King Edgar, Aethelred's father's conquest of the former Danelaw territory, the English coastline once again became the target of Viking raiders in 980 with Devon and Cornwall being directly attacked in 981 and again later in 988 when it is recorded that the Vikings were brought to battle by the Thegns of Devon.

In August 991 events took another twist with the Saxon defeat by a large Viking force at the Battle of Maldon in Essex and later that year Aethelred agreed to paying 10,000 pounds of gold as tribute to buy off the raiders.

The attempt at paying the protection monies and the apparent weakness of Aethelred's regime only seems to have encouraged the Vikings to push for more easy pickings and the raids continued into the late 900's despite various treaties and payments.

The English Heritage map illustrates the position of the town between the River Lyd and its tributary with the earth and timber fortifications covering the eastern approaches. The points on the map show where our pictures were taken during our walk, starting from Lydford Bridge.

Thus it was in 997 that the Vikings returned to Devon in late summer, possibly led by Swein Harroldson using their classic strategy of swift fast movement inland, to gather as much plunder and booty as they could before dashing back to their boats before they could be intercepted by the local militia or fyrd who would be summoned to the defence.

The Danes landed in the Tamar valley on the county border between Devon and Cornwall catching the locals along the river by surprise and pillaging the length of the valley with all its summer crops and fattening livestock, as they made their way inland.

The defences against this kind of attack was based on those established a century earlier by Alfred the Great and as soon as the alarm was raised villagers began to abandon their homes moving their livestock and goods toward the nearest fortified town or burgh as it was known. The burgh protecting the Tamar Valley was Lydford.

The famous Lydford Gorge pictured at Point 1

The town of Lydford is positioned on a steep sided hill beside the River Lyd and another small tributary. The two sides of the hill down to the two water courses are sheer and steep, forming a natural barrier to attack and with the third side covered by a steep earth embankment and ditch topped by a wooden rampart, Lydford was a formidable fortress.

By the time the Vikings arrived before the town defences, it was crammed with refugees and the wall was bristling with fyrd armed and ready to defend it.

The Lydford Battle Memorial Point 2
The Viking host is thought to have numbered around 4,000 men which would have been a large force at the time, and even allowing for men left behind to guard the boats in the Tamar Valley, it is quite reasonable to assume a force of around 3,000 men lined up before the Lydford defences.

As well as its Viking battle, Lydford can boast a display of archaeology that covers the early medieval history of England, from the late Anglo Saxon period through to the Norman occupation and the establishment of the new Norman aristocracy.

A classic example greets the visitor at the centre of the town with the remains of Lydford Castle or as it should be more correctly referred to, Lydford Court House and Prison, for which this tower was built in 1195 and later enlarged by Richard, Earl of Cornwall (1209-1272) who was granted the manor of Lydford and the forest of Dartmoor by his brother, King Henry III, in 1238. He added two stories to the building and heaped the earth around it to create the appearance of a motte, turning the lower floor into a dungeon.

The prison and courthouse as it may have looked around 1370
The courts were held in the tower to oversee the laws of the Royal Forest of Dartmoor and the Stannaries or tin mining areas in Devon, as the regulations, rights and taxes were closely controlled by the crown.

These taxes generated a lot of wealth for Richard funding his rebuilding project and turning him into the richest man in England able to lend money to his brother King Henry.

Lydford Castle built in 1195 seen from Point 2
The tower served as a prison and courtroom until the 19th century, when the courts and prison moved to Princetown on Dartmoor.

Lydford Castle earned a reputation for rough justice and a terrible place to be imprisoned, as the following poem from 1640 illustrates:
"I oft have heard of Lydford law, 
How in the morn they hang and draw, 
And sit in judgement after."

And Richard Strode an imprisoned MP described the place in 1510 as
"one of the most annoious, contagious and detestable places wythen this realme."

It seems they valued the deterrence factor of prison in 1510!


The view towards the north western ramparts from Lydford Castle at Point 4
Next to the castle is the medieval church that is built on the site of the original Anglo Saxon one and helps to give a reference point to the size and situation of the original Saxon settlement.

The view of the medieval church from the castle with the Norman defences beyond
Carolyn on her way to explore the dungeon in Lydford Castle
One of the original arrow slits, the arched windows being a Tudor addition
Beyond the church in the western corner of the burgh lie the remains of the earliest signs of the arrival of the Normans and it makes sense that they would have quickly identified the town as an excellent place to establish a garrison and head quarters to oversee the local area from.

Along the path towards the Norman ringwork we stooped to admire the replica Viking runestone placed by a more peaceful group of representatives from Scandinavia commemorating the 1000th anniversary of the battle.

A replica Viking runestone placed by the men of Scandinavia,
commemorating the 1000th anniversary of the battle
The remains of the Norman works were excavated over fifty years ago and the English Heritage map provides a very good plan of the site enhanced by my own position markers to give you an idea where our pictures were taken.


Carolyn gives a sense of scale next to the remains of the bank seen at Point A on the map of the Norman Castle remains
The ditch in front of the Norman works seen from Point A

Lydfords natural position with steep slopes around the town make it a formidable place to build a stronghold.
Seen from Point B
The interior of the Norman ringwork seen from Point C
View of the ditch in front of the Norman keep as seen from Point D

My beautiful assistant providing a sense of scale in front of the ditch at Point D

The local pub right next to the castle and suitably named.
Returning to the battle in 997 AD we recommenced our walk through the town past the very welcoming and suitably named local pub, The Castle Inn, towards the field close to the village hall, in which can be seen the remains of the original Saxon earthen bank that would have been much higher in its day with a six foot deep ditch to its front topped with ten foot high wooden ramparts.

The remains of the Saxon embankment, Point 5 on the main map

This is the place where the Viking attack is thought to have gone in against the Saxon defences at Lydford
It was in the fields beyond this embankment that the Viking host would have been drawn up determined to break into the fortress before the arrival of the Saxon relief force.

10th Century Viking Warriors
The Viking commander would have much preferred to have taken the town without a fight and so the defenders would have been presented with a noisy intimidating show of force before emissaries would have stepped forward to offer terms with dire threats of what would happen if the Vikings were forced to fight their way in.

The view on top of the Saxon embankment towards the Viking lines from Point 5
This area as the point of attack makes sense as it is the only really level piece of ground around the whole circumference of the Burgh.
It seems that the commander of Lydford was a determined chap as he refused to have any discussions with the Vikings and thus the norsemen were compelled to launch a ferocious frontal attack.

Despite a likely fusillade of javelins and throwing axes followed up by Vikings desperately attempting to get a foothold atop the wall, the attack was beaten off and the invaders concern of being caught inland away from their boats and any chance of escape overcame their desire for the booty and plunder that lay behind the walls of Lydford.

The view from Point 6, with the Saxon embankment in the distance, behind the buildings. This is amid the Viking positions and from the lane along which they retreated with their wounded back to the boats in the River Lyd valley.

The English Heritage sign illustrates the look of the Saxon defences close to the ancient spring restored by the Lydford Parish Council in 2008 
Gathering up their wounded and no doubt making use of the water at the ancient spring just outside the burgh, the Vikings made off down the valley of the River Lyd and to their boats in the Tamar valley.

My beautiful assistant and as a Devon Maid standing in for the Saxon Maid seen in the illustration  
The restored spring is much as it would have appeared in 997 and is well supplied by clear running water from the peaks of Dartmoor close by.

The lane into the town leading up from the spring at Point 7 on the main map
On their way back to their boats, the Vikings made a quick detour to Tavistock where they burnt the monastery and stole everything of value before making their way down river to its mouth, where they are recorded as setting up a fortified camp on a headland, thought to be Torpoint, near modern day Plymouth.

A quick detour to Tavistock to plunder and destroy the monastery
The Devon Fyrd kept the Vikings under observation but didn't attack and the invaders spent the winter there preparing for the next seasons raiding.

The spring was in full flow on the day with all the rain water flowing off of Dartmoor

Another stream close to the spring carrying water off the moor
Lydford is a lovely place to visit, not just for the interesting history, but also the natural beauty this part of Devon has to offer, not to mention the cream teas and cakes on offer at the Lydford Gorge teashop.

Sadly the nearby bookshop was lacking in any books on the Vikings at Lydford which is surprising seeing how cool Vikings are today following all their TV shows recently and considering the monuments to the history to be found in the town.

Other Sources consulted in this post
Battlefield Walks Devon - Rupert Mathews